How to Automatically Send Reminder to People Who Clicked Link in the Previous Email
Using automated emails in the EasyMail7 you can send pre-written follow-up emails to your subscribers over time sequentially and automatically after they’ve subscribed to your list. It is an effective way to engage your subscribers and dramatically increase your conversion rate.
But sometimes you may need to send just a single email in response to the recipient’s action, for example, a welcome email, a reminder about an upcoming event, an email with a download link, etc. etc. You can send such an email automatically using an autoresponder in the EasyMail7.
Here is the scenario. For example, you send an email with a call-to-action button to each new subscriber added to your list. The recipient must click on that button if he wants to be sent a reminder via email. The recipient clicks on the button and gets a “thank you” page telling “Thank you. We will send you a reminder about the upcoming event”. The same day or in a particular number of days the autoresponder sends a reminder to people who clicked the call-to-action and asked for the reminder. This scenario can be accomplished using G-Lock Analytics email tracking service and automated emails in the EasyMail7.
Just follow the steps below:
Step 1. Create Account on G-Lock Analytics
G-Lock Analytics is used to track the recipient’s click and report it to the EasyMail7 so that the program knows who clicked the button and must be sent the reminder.
If you already have an account with G-Lock Analytics, skip this step.
If you do not have an account yet, create it now.
Enter your login email address and password under Settings -> Analytics Settings.
Step 2. Create Automated Emails Series
Go to “Autoresponder” and click “New”.
Create a new series:
Email Series Name – enter a name for the email series.
Select Group – select the group the email series will send emails to. Important! You can select only one group at a time.
Date Field – select the field with the date when the subscriber was added to the list.
Send to contacts where [Date Field] is greater than: – check this option and choose the date if you want to send follow-up emails to contacts whose subscribe date is greater than the selected date.
If you don’t check the above option, the series sends the emails to all contacts in the group.
Start sending at: – choose the date when the series will start sending emails.
On what days email messages should be sent: – choose the days when the program will send automated emails.
On what time email messages should be sent: – choose the start time and end time when the program will start and stop sending automated emails.
Click OK.

Now after you created the email series, you can add emails to it. Since the reminder will be sent depending on whether or not the recipient clicked the button in the first message, you have to send the first message using the automated emails series, too. Thus, the series will send two emails: initial email with the call-to-action button and the reminder to the people who clicked the button.
Step 3. Add Message #1
Click on “Message” on the menu bar and write the message. Add the call-to-action button with a link.
Select the account you will send emails from in the “From” field.
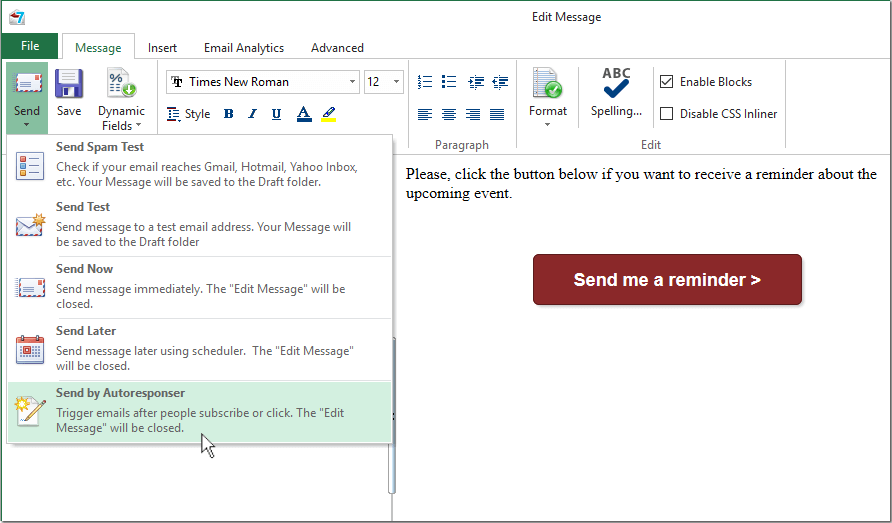
Click “Send”.
Select “Send by Autoresponder” from the “Send” button menu.
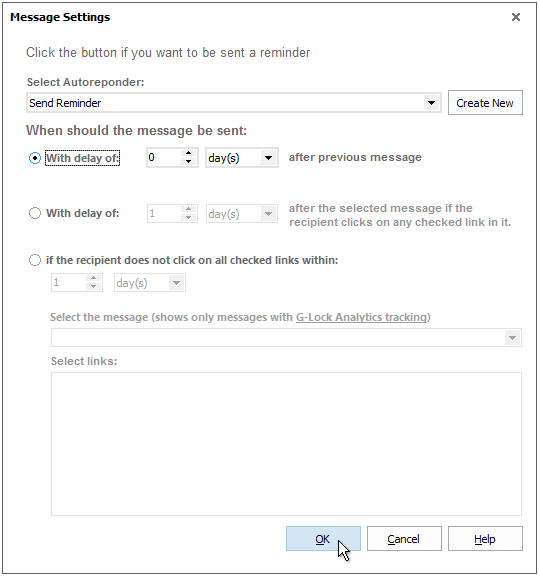
In the Message Settings select the email series and set the condition “With delay of xx days (hours) after previous message”.
When you are setting up the first message, it will be sent in xx days (hours) after the date you selected in the email series settings. To send the message immediately, enter 0 into the days/hours field.
Click OK.
Step 4. Add Message #2 (Reminder)
Click on “Message” on the menu bar and write the reminder.
Select the account you will send emails from in the “From” field.
Click “Send”.
Select “Send by Autoresponder” from the “Send” menu.
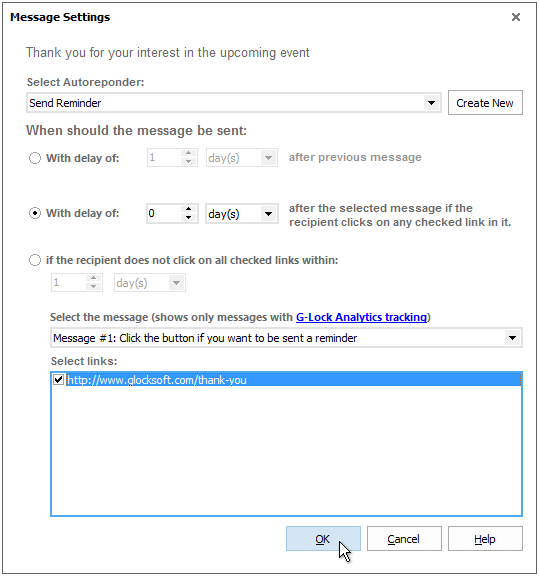
In the Message Settings select the email series and set the condition “With delay of xx days (hours) after the selected message if the recipient clicks on any link in it“. Choose 0 days (hours) to send the reminder immediately after the recipient clicks the call-to-action button.
Next select the message #1 and put the check mark next to the link.
Click OK.
Turn the messages and the email series to On and leave the computer or server where the EasyMail7 Server is installed turned to On.
The program will send the first email with the call-to-action button to all subscribed contacts in the group and the reminder will be sent to only those contacts who will click the call-to-action button. If you add new subscribers to the group, the program will send the first message to newly added contacts and the reminder to those who will click the button.
