How to Use SparkPost SMTP Settings in EasyMail7 to Send Email Newsletters
G-Lock EasyMail7 works perfectly with any third party SMTP server and delivery service like Amazon SES, SparkPost, SendGrid, Mailjet, Mailgun and others.
This tutorial guides you through the steps how to configure EasyMail7 to use the SparkPost’s SMTP settings to send your email newsletters in style.
The tutorial assumes that you have already installed and activated either the trial or licensed version of EasyMail7.
If you don’t have an account with SparkPost yet, you can create it here.
Configuration of EasyMail7 with SparkPost SMTP
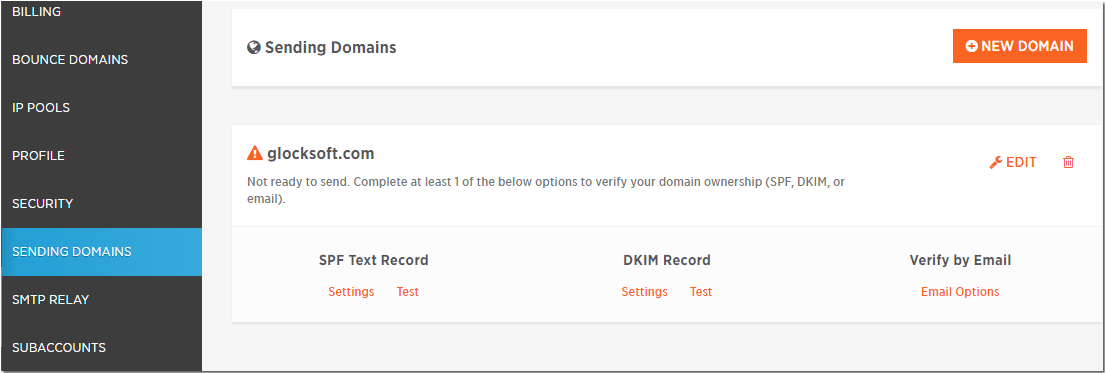
Step 1. Add and Verify Your Sending Domain.
In your SparkPost account, go to Dashboard -> Account -> Sending Domains and add your sending domain.

Use one of the 3 methods to verify the ownership of your sending domain:
1) SPF text record. Click “Settings”, copy the value and add it to your DNS.
2) DKIM record. Click “Settings”, copy the value and add it to your DNS.
Be aware that DNS changes can take up to 24 hours to propagate, based on your DNS service provider. To check if the domain is verified, click “Test”.
3) Verify by email. An email will be instantly sent at your abuse@yourdomain.com or postmaster@yourdomain.com address. Click the link in the email to verify the domain.
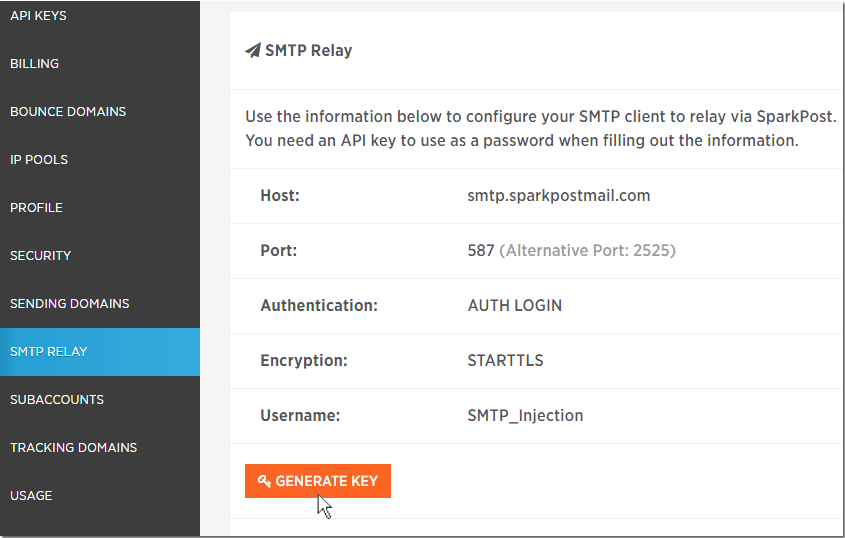
Step 2. Get SparkPost’s SMTP Credentials.
After you verified your sending domain, go to the “SMTP Relay” tab.
Click “Generate Key”. You’ll use the generated key as the password in G-Lock EasyMail7.
Step 3. Enter SparkPost’s SMTP Credentials in EasyMail7.
Start EasyMail7 and go to Settings -> Email Accounts.
Click “Add New”.
Enter the account name, your “From” name, “From” email address, “Bounce (return)” email address and “Reply” email address under the General tab.
Then click on the “Delivery Options” tab.
Choose the “Send via SMTP Server” delivery mode and enter the SMTP credentials you’ve got from SparkPost:
SMTP Server: smtp.sparkpostmail.com
Port: 587
Security Protocol: STARTTLS
My server requires authentication: Yes
Login: SMTP_Injection
Password: your key
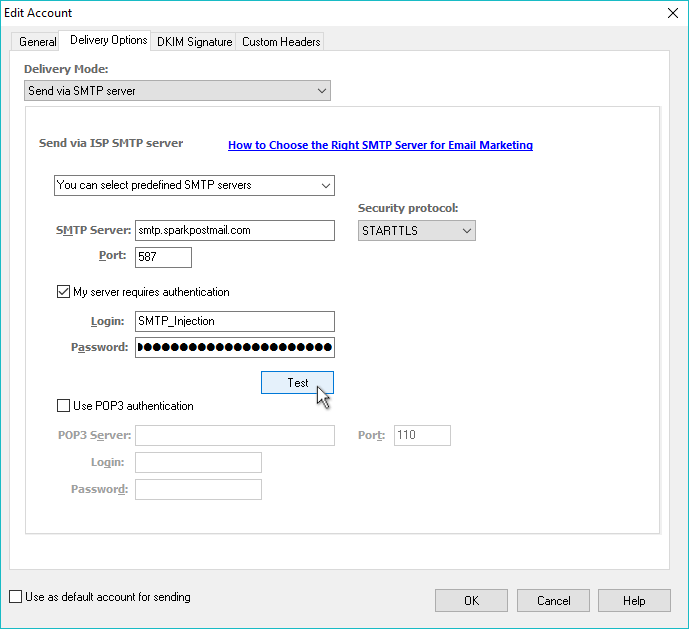
Click “Test” to test the SMTP settings.
If you receive a test email from EasyMail7, everything is good and you are done. If not, double check if your settings are correct.
You can also set up the throttling values based on your SparkPost quota.
Go to the Usage tab under your SparkPost Account settings and see your hourly and daily quota limits.
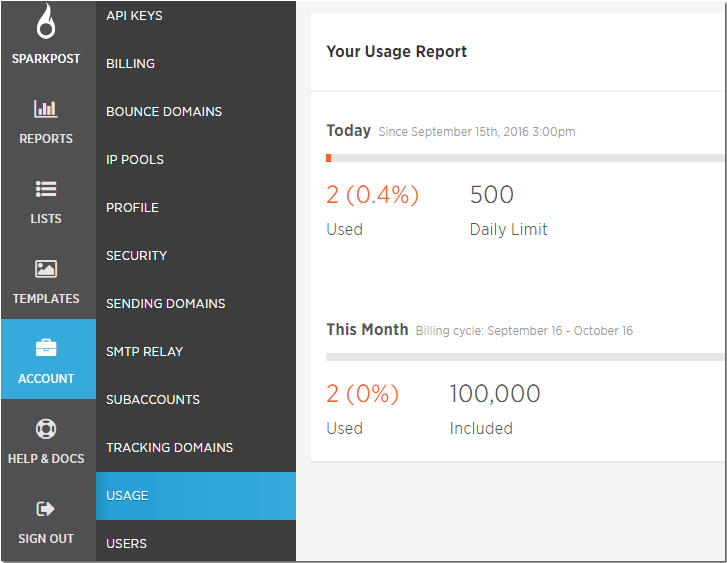
Now click on the general tab in G-Lock EasyMail7 Account settings and enter your hourly and/or daily quota according to the SparkPost’s limitations.
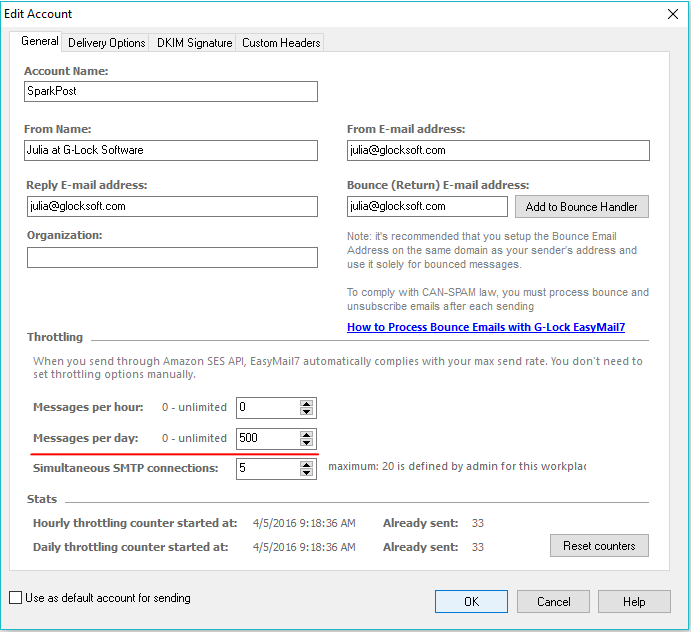
Click OK to save the account settings in G-Lock EasyMail7.
Track Bounce Emails from SparkPost
SparkPost does not send bounce emails back to you. So, it is not possible to process bounce messages with G-Lock EasyMail7’s Bounce Handler.
Instead, you can use the GlockApps spam testing tool to track bounce emails and get bounce email analytics. GlockApps Bounce Monitor is integrated with SparkPost via API. It provides the breakdown of bounces by their type, sender email address, sender domain, and provider and allows to easily determine sudden spikes in the bounce rate and/or complaint rate.
You can download bounce emails reports any time and load bounce emails into the Global Exclusion List in G-Lock EasyMail7.
