How to Integrate EasyMail7 with SMTP Relay Services and Mail Servers
SMTP integration in EasyMail7 allows you to integrate with multiple well-known SMTP services such as Amazon SES, Mailgun, SendGrid, Mailjet, SparkPost and other SMTP relay services.
In addition to that, you can use your own mail server in EasyMail7.
EasyMail7 allows you to connect with multiple SMTP services and mail servers and easily switch between email accounts to send emails based on your requirements.
You can, for example, send time-sensitive emails via an SMTP relay that provides the highest speed and deliverability to ensure that all of your email recipients receive the email.
Or you can segment your contact list by domain and send emails to different domains using different SMTP servers known to deliver emails better to a particular domain.
The SMTP integration in EasyMail7 is fast.
Follow the steps below to configure an email account with the SMTP settings in EasyMail7:
Step 1. Enter Your Sender Information.
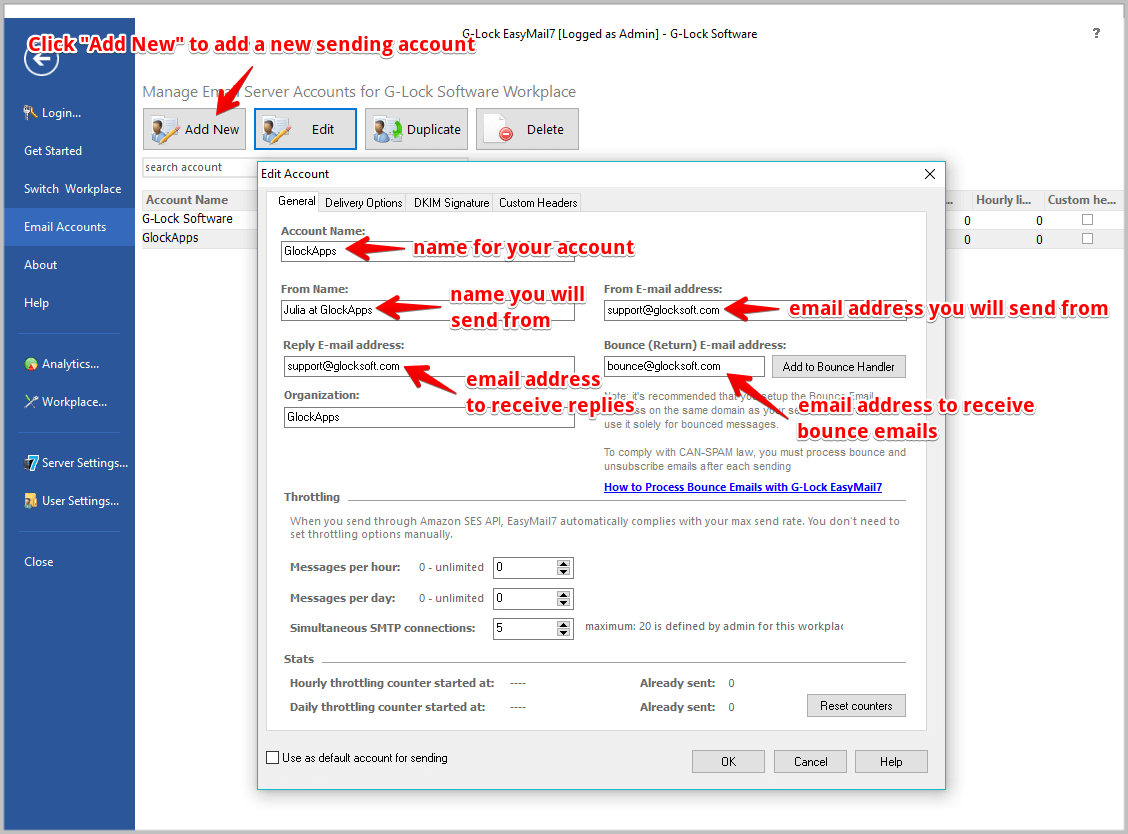
Click on Settings -> Email Accounts -> Add New.
Under the General tab, enter your sender information:
Account Name – name for your account in EasyMail7 (will not be shown anywhere in the message).
From Name – will show up in the recipient’s email as the person who sent the message.
Email Address – email address from which you will send emails. It must be a valid email address. When you enter the email address, it repeats throughout the form.
Reply E-mail Address – email address that you want the replies to go to. If you do not enter a different email address into this field, the replies will be sent to the email address, from which you send them.
Bounce (Return) E-mail Address – email address, to which you will receive bounce (returned) email messages. If you do not enter a different email address into this field, bounce messages will be returned to your “From” email address.
Organization – name of your group, company or organization (not required).
When done, click on the Delivery Options tab.
Step 2. Enter the SMTP Information.
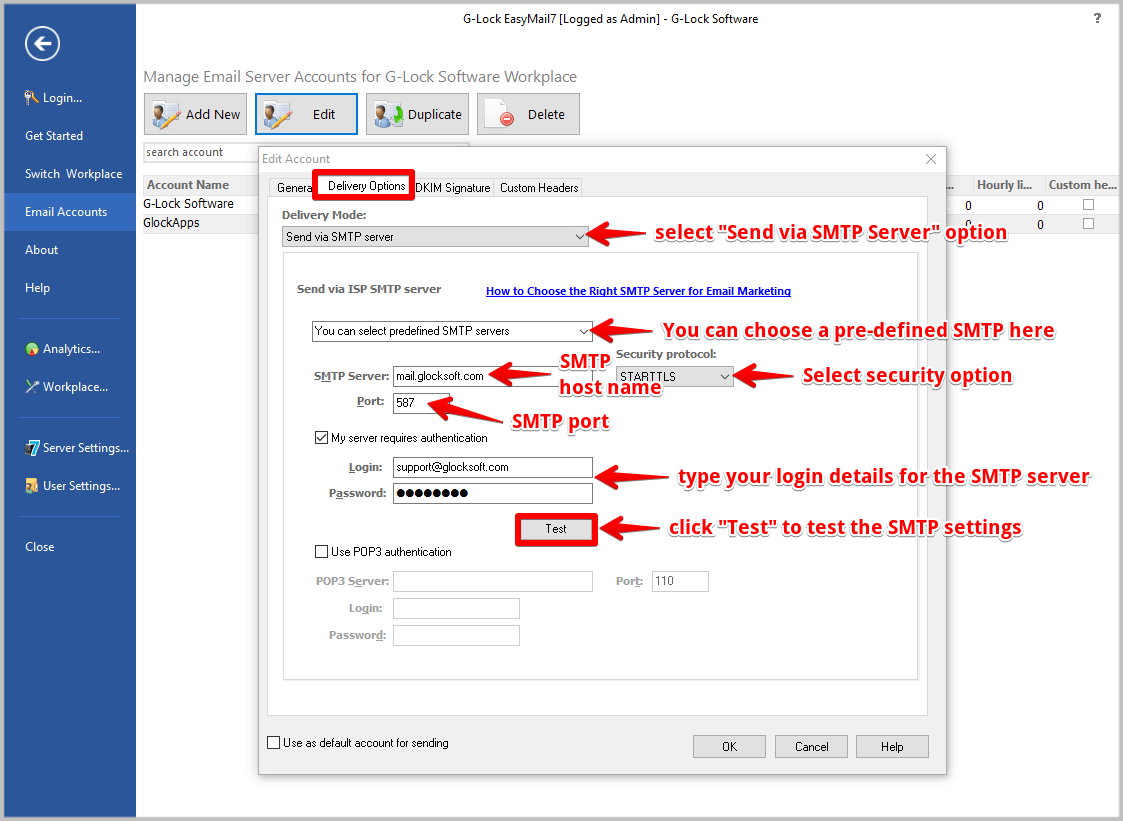
Select the “Send via SMTP Server” delivery option and enter the SMTP server information:
SMTP Server – the SMTP server name you will use. Some SMTP servers are predefined in EasyMail7 so you can choose the SMTP server from the menu. If you use your own SMTP server, it usually reads something like mail.yourdomain.com or smtp.yourdomain.com. If you are using an SMTP relay service, copy the SMTP server name in your account you have set up with the SMTP service.
Port – port number that EasyMail7 will use to connect to the SMTP server. The default port is 25. For SSL connection, the port is usually 465, for STARTTLS – 587. Check the correct port number in your account with an SMTP relay service.
Security protocol – if your SMTP server requires secure connection, choose STARTTLS or SSL.
My Server Requires Authentication – check this option if your server requires authentication and enter your login and password. If you are using an SMTP relay service, copy the correct username and password in your account with the relay service.
Use POP3 Authentication – check this option if your SMTP server requires a POP3 authentication and enter your POP3 server name, port number (usually 110), your login, and password. POP3 authentication means that you must connect to the POP3 server to be allowed to send the emails. As soon as you do it, the ISP opens you a “window” for some time during which you can send the messages. This authentication method is rarely used at present.
Step 3. Test the SMTP Settings.
It is necessary to test your SMTP settings and make sure that you entered all the details accurately. This will protect you from failures dueing email sending.
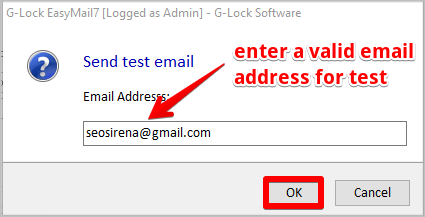
Click the Test button, type a valid email address and click OK.
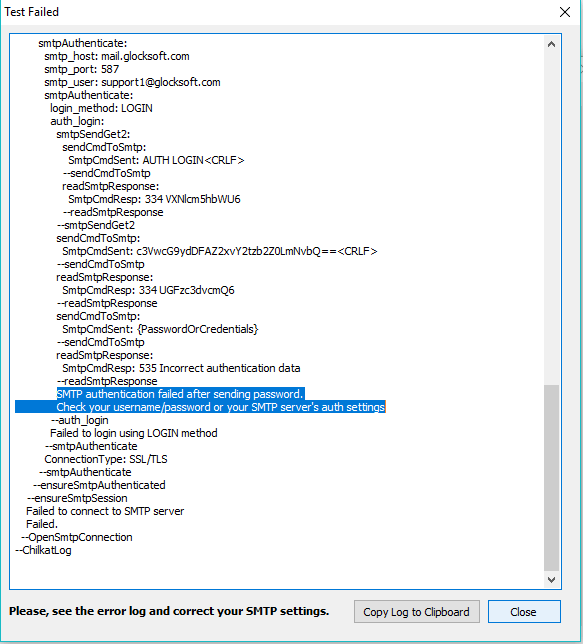
If there is any issue with your SMTP server information, you will see the detailed log.
Scroll down the log and find the failure cause. Correct the issue and test again.
When the SMTP details are correct, you will see the below message.
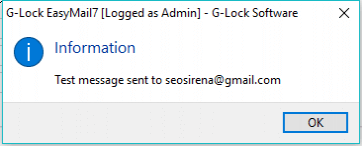
Check your test email address for the email message about your SMTP settings. If you get it, hence, you are now ready to send emails.


