How to Use Yahoo’s SMTP Settings in EasyMail7 to Send Email Newsletters
Yahoo is a very popular mailbox provider that allows you to send emails through their SMTP server. And you can certainly do it after connecting your Yahoo email account with EasyMail7.
This tutorial guides you through the steps how to configure EasyMail7 to use the Yahoo SMTP settings.
Step 1. Allow Access to Your Yahoo Email Account.
There is one important thing which has to be done for successful integration of the Yahoo SMTP server with EasyMail7.
Yahoo is protecting your email account from unauthorized access and is not allowing other applications to connect to it.
So, in order EasyMail7 can use your Yahoo email account for sending emails, you need to turn the access to On.
To do this, login to your Yahoo email account in the browser.
Go to the “Account Info”.
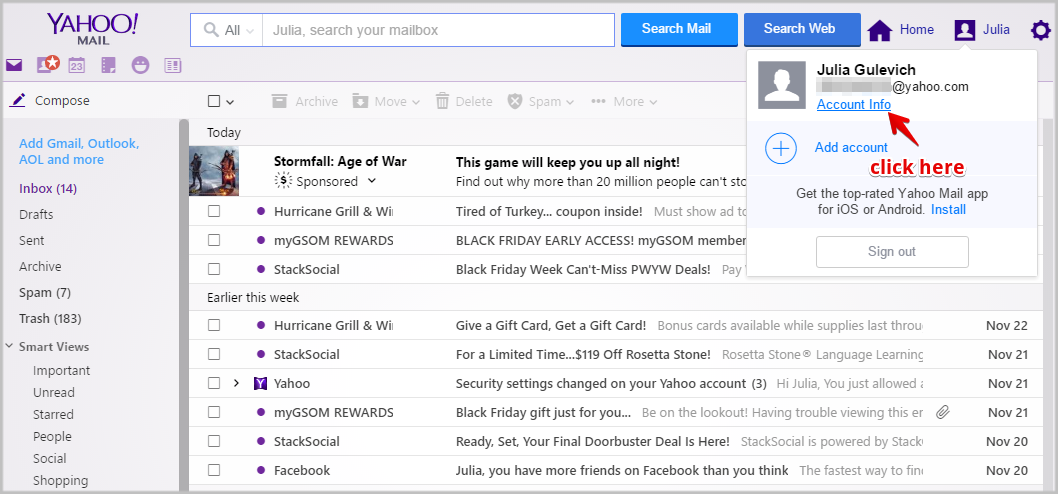
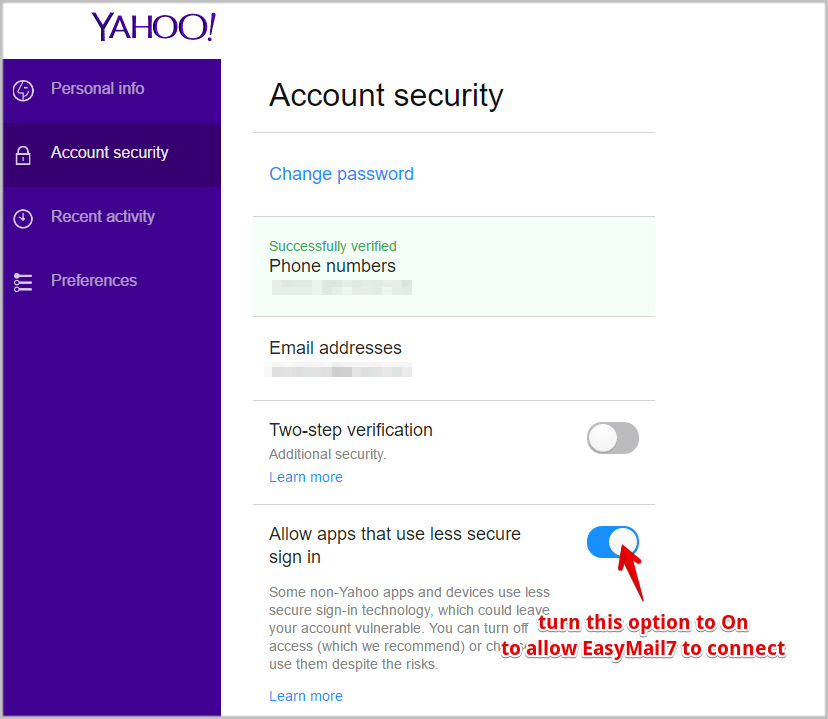
Click on the “Account Security” tab.
Turn the “Allow apps that use less secure sign-in” option to On.
Go to the Steps 2.
Step 2. Configure EasyMail7 to Use the Yahoo’s SMTP.
Start EasyMail7 and go to Settings -> Email Accounts.
Click “Add New”.
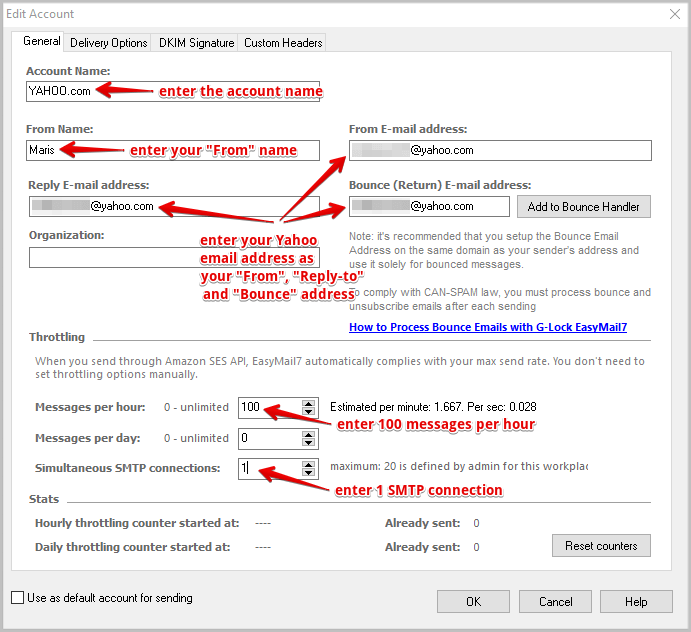
Enter the account name and your “From” name.
Enter your Yahoo email address as the “From” email address, “Bounce (return)” email address and “Reply” email address under the General tab.
Set the limitation 100 emails per hour and 1 SMTP connection to comply with the Yahoo’s sending restrictions.
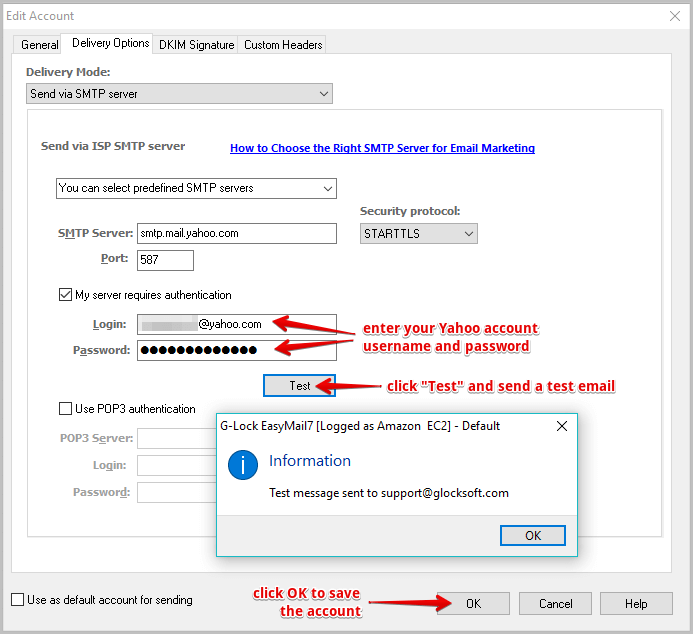
Then click on the “Delivery Options” tab.
Choose the “Send via SMTP Server” delivery mode and then choose Yahoo from the list of pre-defined SMTP.
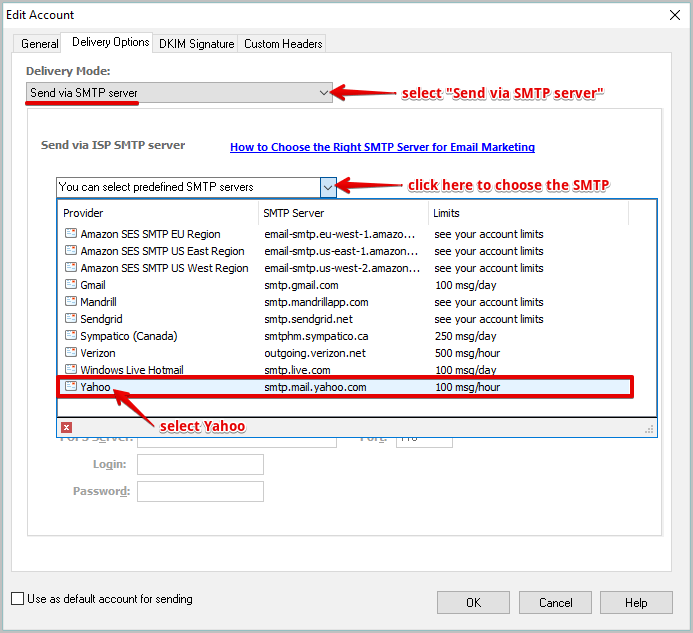
EasyMail7 will fill in the SMTP server (smtp.mail.yahoo.com), port (587), and security protocol (STARTTLS).
Now check the “My server requires authentication” option and enter your Yahoo account login username and password.
Click “Test” to test the SMTP settings.
If you receive a test email from EasyMail7, everything is good and you are done. If not, double check if your settings are correct.
Click OK to save the account settings in EasyMail7.
Step 3. Configure Bounce Handling in EasyMail7.
There is one more important thing you need to do — configure bounce handling to suppress bounced and complaining users from your mailing list and maintain a good sender reputation.
Follow these steps:
Return to the main EasyMail7 window.
Click on “Bounce Handler” at the left pane.
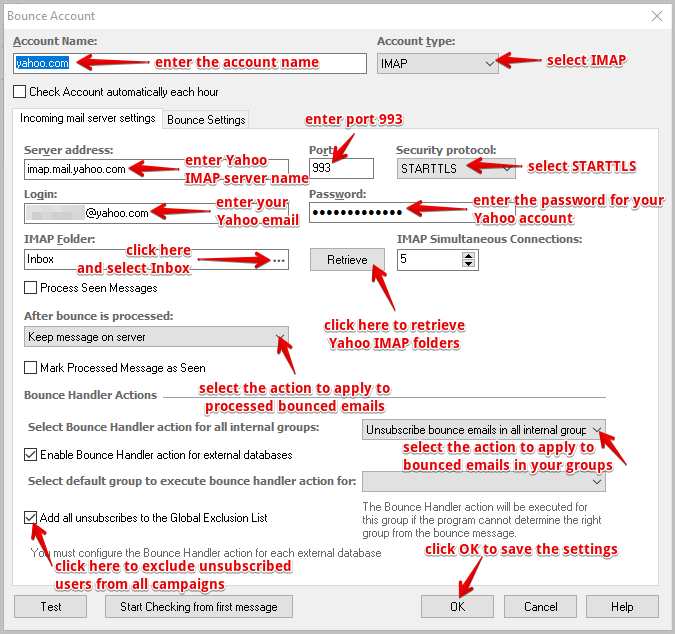
Create an account in the Bounce Handler with the following settings:
Account Type: IMAP
Server: imap.mail.yahoo.com
Port: 993
Security protocol: STARTTLS
Login: your Yahoo email address
Password: password for your Yahoo email account
Click “Retrieve” and wait for a while.
Then click on three dots in the “IMAP Folder” menu and select the Yahoo folder from which the system will retrieve bounced emails. usually, bounces come to the Inbox.
Also, set other actions and options that will be applied to bounced emails and click OK to save the account.
Now you can manually start the account check in the Bounce Handler after each broadcast to get your bounced emails handled and deleted/unsubscribed in your contact groups. Or, you can then go to the bounced account settings and check the option to automatically check your account and process bounces every hour.
Here you can read more about bounce handling in EasyMail7


