How to Insert Picture into the Email Template Using G-Lock EasyMail7
G-Lock EasyMail7 supports the regular “Insert Picture” option and the unique “Image Wizard” option. The “Image Wizard” allows you to re-size, crop and compress the picture, then insert it into the template or message. This helps you decrease the size of your message, save bandwidth and speed up sending.
Watch this quick video to learn how to how to quickly insert a picture into the template or message in G-Lock EasyMail7:
Insert Picture into the Email Template
If your picture has the correct size and does not need to be adjusted to fit well into the template or message, you can use the regular “Insert Picture” option.
Open the template in the edit mode.
Select the existing picture or put the cursor at the new location.
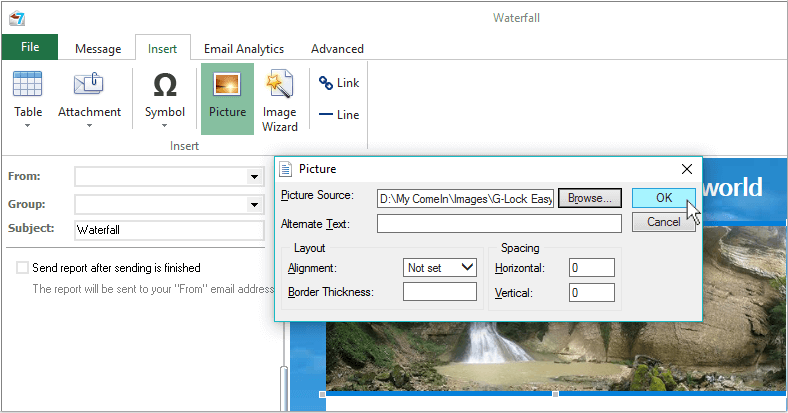
Click on the “Insert”tab and then click “Picture”.
Click “Browse” to select a picture in the folder, or type the link to the picture on the website.
Click OK.
Insert Picture into the Email Template Using Image Wizard
In this article I told you how you can compress your images and decrease the size of your HTML message to speed up sending. Now G-Lock EasyMail7 supports the same technology of image compression the TinyPNG site uses.
So, if the picture has a big size and does not fit well into the template, you can use the “Image Wizard” in G-Lock EasyMail7.
With the “Image Wizard” you can re-size, crop and compress the picture just inside the program, and then insert it into the template or message. This way you decrease the size of your message, save bandwidth and loading time, and speed up sending.
Using the “Image Wizard” you can insert pictures from a local folder only.
Select the default picture in the template.
Click on the “Insert” tab and then click “Image Wizard”.
Select your picture in the local folder or search for a picture among the Pixabay images. Double click the mouse on the Pixabay picture that you want to insert into your template.
At the right panel you can see the template and image placeholder. At the left panel, you can see your picture.
Drag the edge of the frame on the picture to capture the area you want to insert. Hold down Shift to keep the aspect ratio of the captured area.
The captured area is shown in the placeholder at the right panel. When you replace the existing picture, the placeholder has the correct size of the picture.
For better preview, you can drag the placeholder and put it on the existing picture that you want to replace.
At the bottom of the “Image Wizard”, you can see the “Enable compression for images” option. It compresses the picture and decreases its size. You can uncheck this option if the quality of the inserted picture is not good.
Also, there is a couple of buttons:
“Load Image” allows you to load a different picture from a folder.
“Rotate” allows to rotate the picture.
By clicking “Apply” you can insert the picture and by clicking “Cancel” you can cancel the changes and close the Image Wizard.

Not only can you replace default pictures, you can also insert new pictures into the template using the “Image Wizard”.
When you insert the picture into the new place, you can re-size the placeholder yourself to achieve the desired picture size.
If you leave the images as is, they will be embedded into the message when you send it. To decrease the message size even more and increase the sending speed, you can upload the pictures to your FTP server. G-Lock EasyMail7 automatically replaces all local pictures in the template with the pictures from your web server.
When you are done with pictures, you can add your text and save the template for further use.
