How to Send Personal Attachments to Your Subscribers
In some situations you may need to send a unique email attachment to each of your subscribers. For example, you may want to attach an individual .pdf invoice to the message sent to each recipient. You can easily do this with G-Lock EasyMail7. Just watch this 2-minute video:
How to Send Individual Attachments to Different Recipients
Step 1. Import Attachments’ Names into the Group.
Save the files that you want to send as attachments to a folder.
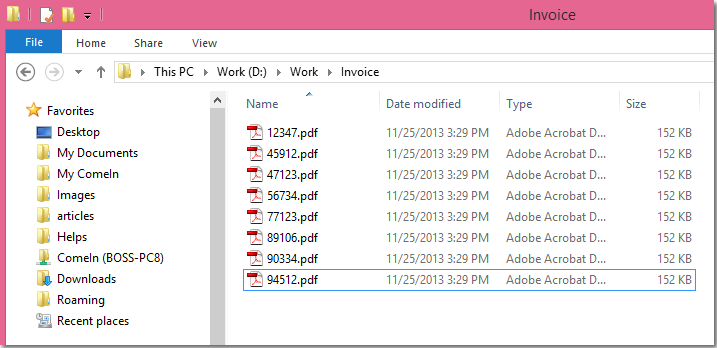
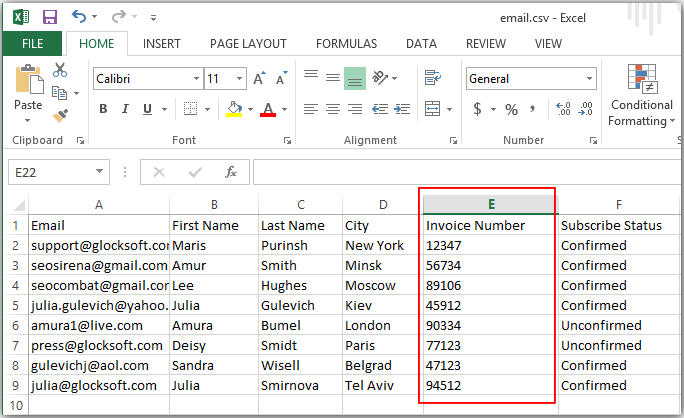
Save or import the file names into a field in your file or database where your contacts are stored.
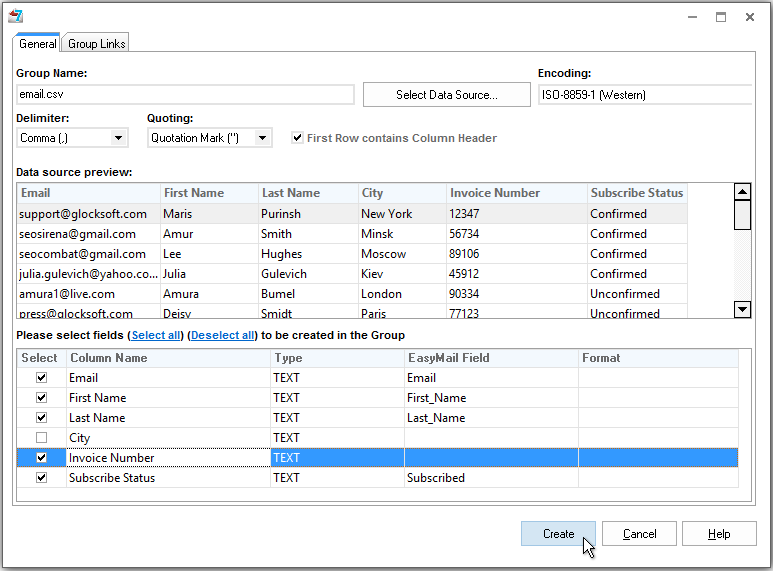
Create a group in G-Lock EasyMail7 and import the attachments' names into a separate field. See here how to quickly import the contact information into a group in the EasyMail7.
Step 2. Mail Merge Email with Different Attachments.
Create the message, select the account in the From field and the group in the Group field.
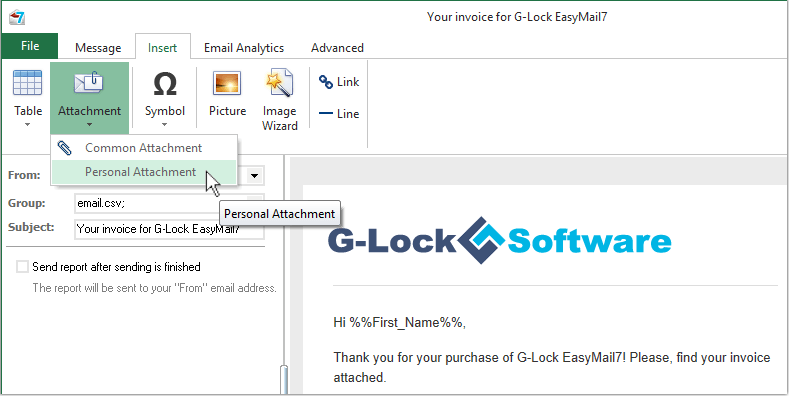
Click on the “Insert” tab.
Click "Attachment -> Personal Attachment".
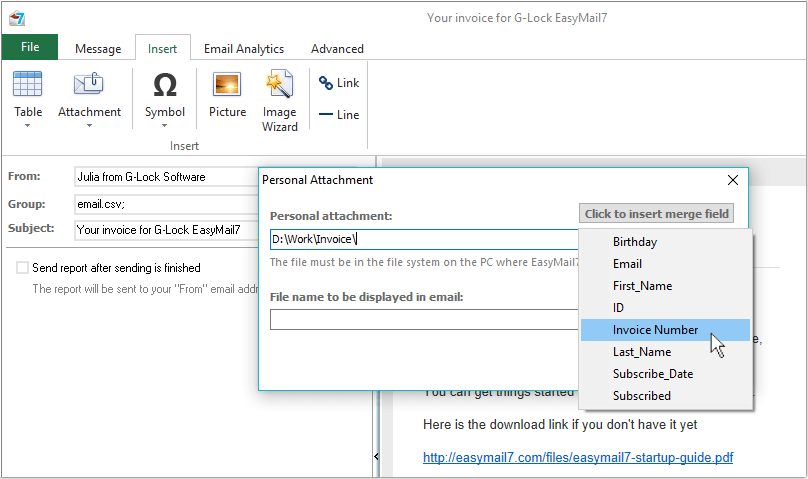
Type the path to the folder where the attachments are stored.
Instead of the real file name merge the field name that stores the attachments' names in the group.
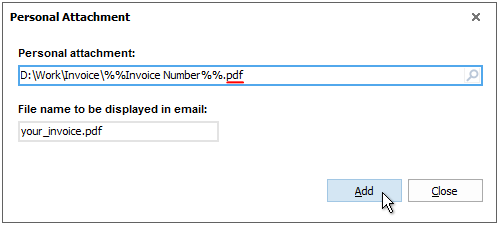
After the merged field name, type the extension of the files.
If you want the attachment to be called the same for all contacts, type the file name with the extension in the separate field.
Click "Add".
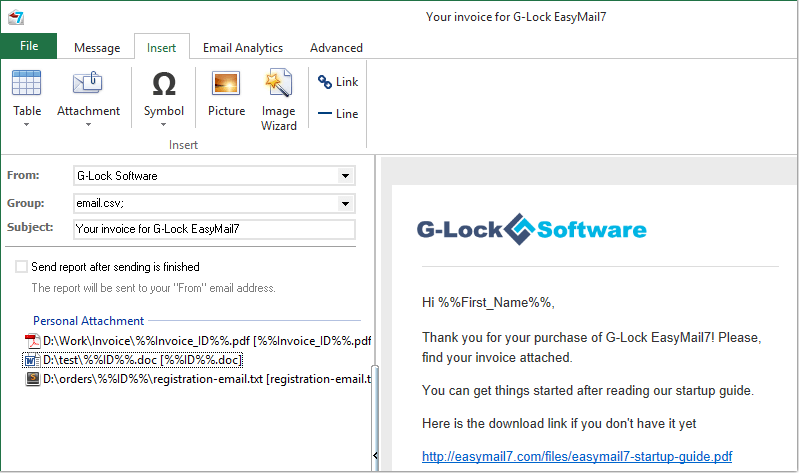
How to Send Multiple Different Attachments
Though you can add only one personal attachment at a time, you can repeat the steps above to add more attachments to the same message.
Step 3. Send Different Attachments to Different Recipients.
Send the message to the group.
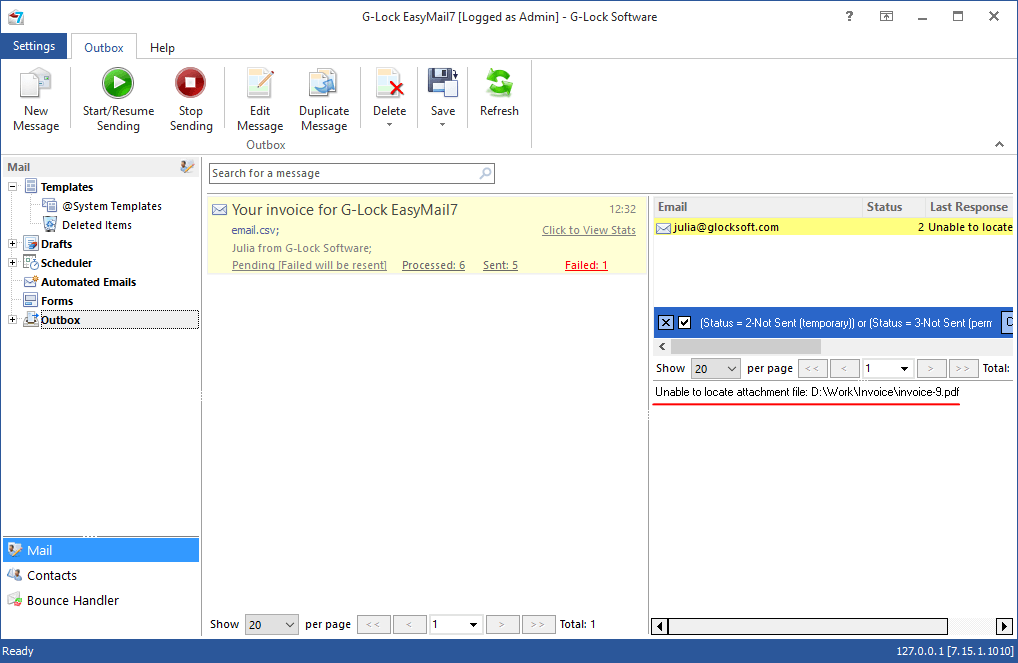
You can click on "Failed" items in the Outbox and see the sending log.
If the sending failed because of the inability to attach the correct file to the message, the log will show the error like "Unable to locate attachment file: D:\Work\Invoice\12347.pdf".
Make sure that the file exists in the folder.
Then make sure that the field in the group that you use to define the attachment name has values for all subscribers.
After you correct the issue, click on "Start/Resume Sending" button in the Outbox to re-send failed messages.
