How to Send Personalized Email Messages with G-Lock EasyMail7
With dynamic fields in EasyMail7, you can dynamically add content to your email message and customize it for each recipient. The simplest example of email customization is when you merge the recipient’s first name into the salutation to make them feel you address them personally.
Some marketers used to merge the name into the Subject line to immediately notify the subscriber that the email is coming from someone they know. Using dynamic fields, you can add the current date to the message, include a personal link for each recipient, attach a unique file to the message for each subscriber and even create the entire email newsletter. The possibilities are countless.
Follow the steps below to create and send personalized email messages to your subscribers.
Create Group with Custom Fields
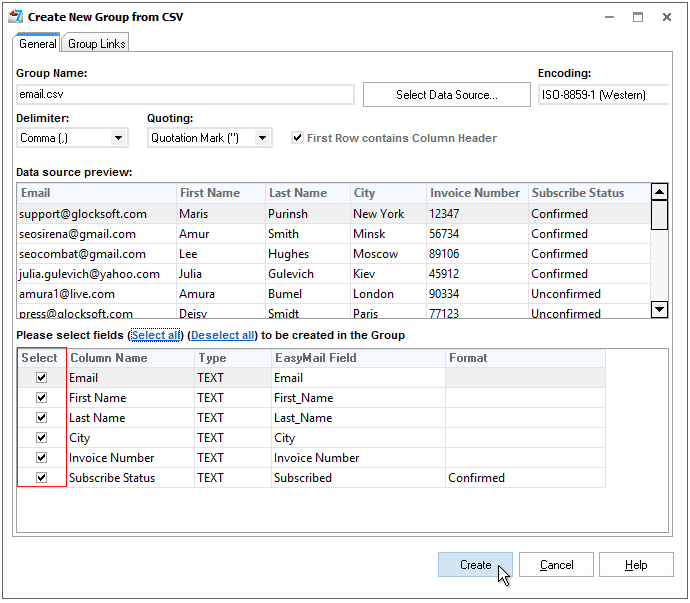
Whatever information you collect about your subscribers during the opt-in process you can import all the subscriber’s data into G-Lock EasyMail7 and then use it in email newsletters. In our email system, you can have an unlimited number of custom fields to store the contact information.
When you create a group from the file or link to an external database from G-Lock EasyMail7, you can select any number of fields for importing into G-Lock EasyMail7. Just put the check marks next to the fields you want to show in the program and that you may need to use for email personalization.
Use Dynamic Fields in the Message Body and Subject
After you import the contact information into the group, you can use dynamic fields to personalize your email newsletter.
Here’s how you do it:
Open the message in G-Lock EasyMail7 in the edit mode.
Select the group you will send the email to in the "Group" field.
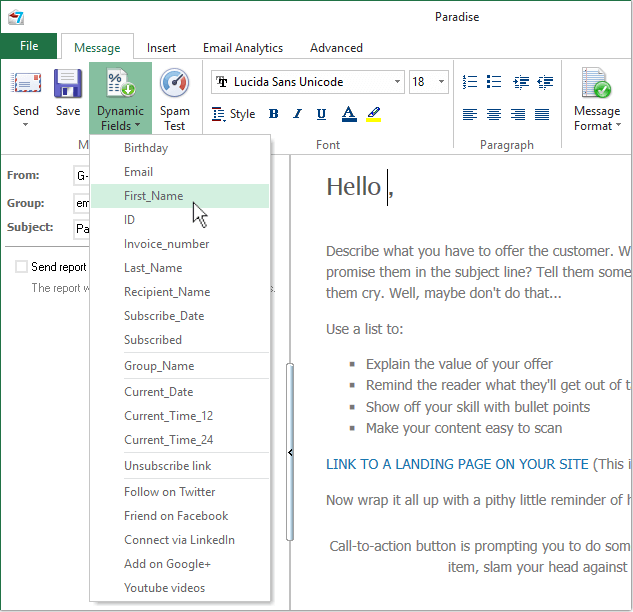
Put the mouse at the place where you will merge the recipient’s information, for example, after “Hi” or “Dear”.
Click on the "Dynamic Fields" menu.
Select the field name, for example, First_Name. The field is merged in this format %%First_Name%%.
Use the same procedure to merge a field into the Subject line.
Merge Images into the Message
Besides text and URLs, you can use merge tags to merge custom images into the messages.
Here are the steps you should follow:
1. Upload the images to your web server.
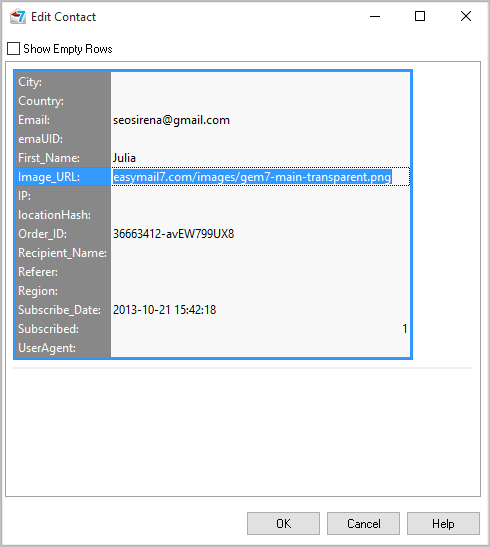
2. Import or add manually the URLs of the images into the group of recipients so that each recipient is associated with the correct image URL.
The URL must not include http://
Example: easymail7.com/images/gem7-main-transparent.png
3. Create an email message and insert any picture into the desired place.
4. Go to the message source and find the image path. Replace it with http:// followed by the variable that contains the images URLs in the group.
You can merge the variable in the correct format using the Merge menu.
Example:
<img align="baseline" alt="" src="http://%%Image_URL%%" border="0" hspace="0">
5. Go to the Preview tab and switch between the recipients to see if the correct images were merged or not.
Preview Personalized Message for Each Recipient
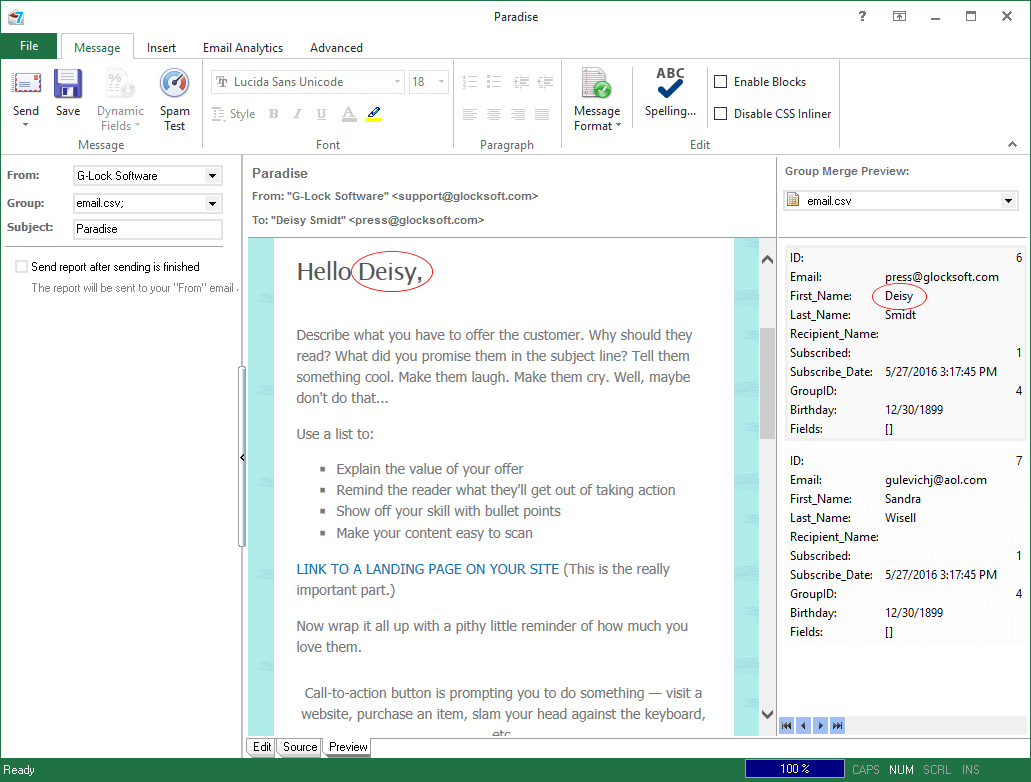
Now you can preview the message to make sure that the subscriber’s data is merged correctly before sending the email newsletter to the group.
In the "From" field select the account name you will send the message from.
Click on the “Preview” tab at the bottom of the "Edit Message" window.
Look how the value is merged. This is how your recipient will see the message.
You can use the buttons |<<, <, >, >>| to switch between the subscribers.
If you send the email to more than one group, select the groups one by one in the "Group Merge Preview:" menu. The program shows the message preview for the top 10 contacts from each group.
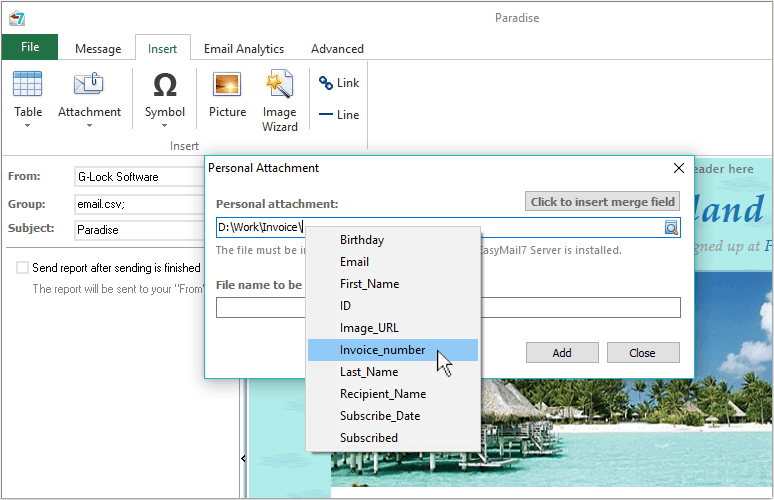
Use Dynamic Fields to Send Personal Attachments
The message body and Subject are not the only places where you can use dynamic fields. You can also use dynamic fields to send a personal attachment to each recipient. You can do this by merging a field name into the attachment file name.
Here you can read more about how to send different attachments to different recipients.
After you make sure that the fields are merged correctly, click “Send” to send the message to the group.
