How to Sign Email with DKIM Signature in G-Lock EasyMail7
Authentication helps legitimate senders prove that their email isn’t forged, and can help receiving servers like ISPs and corporate email servers control inbound spam. There are a variety of authentication methods: SPF, SenderID, DomainKeys, and DKIM. SPF and SenderID allow a domain owner to add a file or record on the server that the recipient server cross-checks. These are easy to implement, but some suggest they aren’t as secure. DKIM and DomainKeys embed information within the email, making it harder to forge. The DKIM record allows to digitally “sign” your emails for your domain. You can learn more about DKIM here
Starting from the version 7.7 EasyMail7 allows you to add a DKIM signature to your emails.
Follow the steps below to sign email with DKIM signature in EasyMail7:
Step 1. Make key-pair certificate.
First of all, you need to generate a certificate which contains public key/private key. You can use MakeCert.exe (.NET Framework Tools) to generate the certificate. You can download makecert.exe here
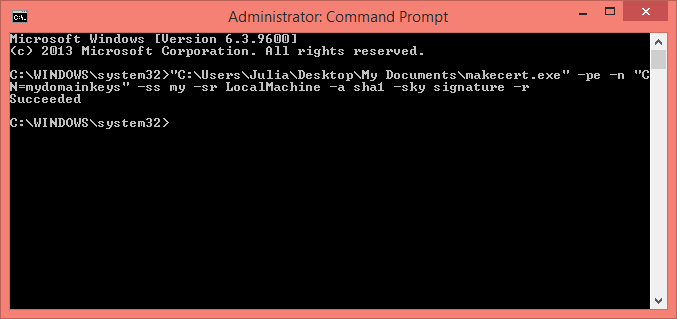
If you are on Windows 7 or 8, run Command Prompt as Admin, type the path to the makecert.exe file on the disk and then type
-pe -n "CN=mydomainkeys" -ss my -sr LocalMachine -a sha1 -sky signature -r
Press Enter.
If you are on Windows XP, click on Windows Start -> Run.
Type the path to the makecert.exe file on the disk and then type
-pe -n "CN=mydomainkeys" -ss my -sr LocalMachine -a sha1 -sky signature -r
Example:
C:\Users\Julia\Desktop\My Documents\makecert.exe -pe -n "CN=mydomainkeys" -ss my -sr LocalMachine -a sha1 -sky signature -r
Press Enter.
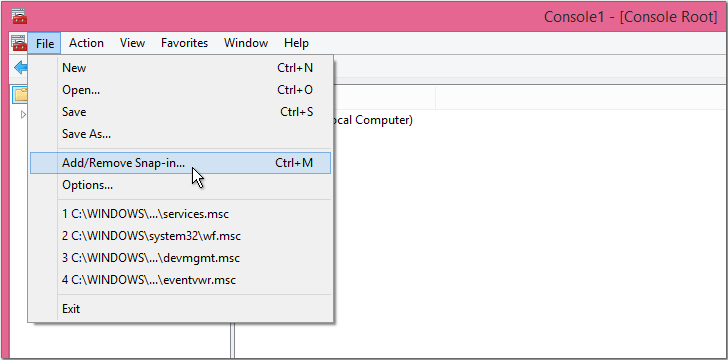
Now click Windows Start -> Run.
Type MMC and press Enter.
Click on File -> Add/Remove Span-in.
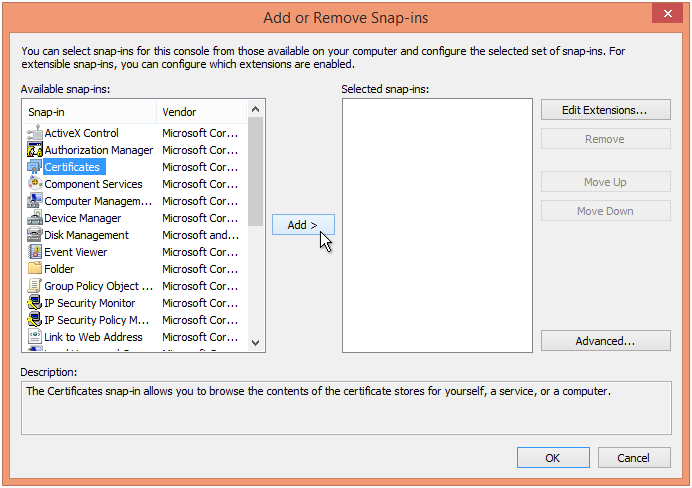
Choose Certificates and click Add.
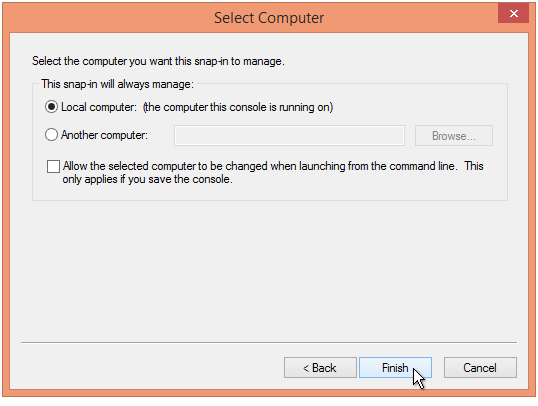
Select Computer Account -> Local Computer -> Finish.
Click OK.
You must see the certificate under Certificates (Local Computer) -> Personal -> Certificates.
Step 2. Export key-pair certificate.
Now export the certificate with MMC.
Click the right mouse button on the certificate and then click All Tasks -> Export.

During the export choose Yes, export the private key -> Personal Information Exchange.
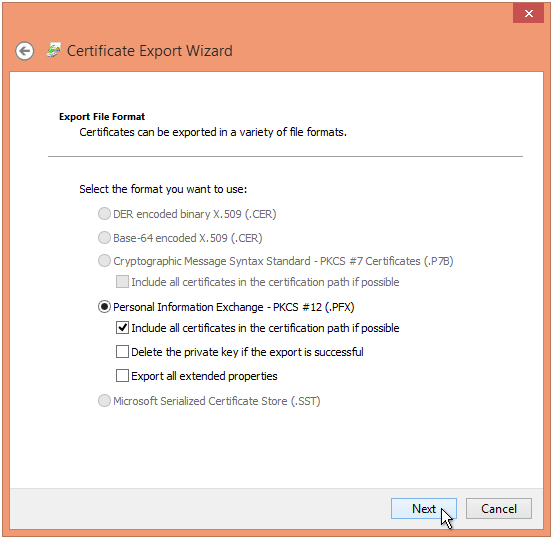
Type the and confirm the password, type the name for the .pfx file, for example domain.pfx, and finish the export.
Step 3. Configure EasyMail7 to sign email with DKIM signature.
Open EasyMail7 and login.
Go to Settings -> Email Accounts.
Select an account and click on Edit Account.
Click on DKIM Signature tab.
Check the "Sign email with DKIM Signature" option.
Fill in the fields:
Email sender domain: typically the same domain as the sender of an email.
Domain public key selector: an arbitrary string to identify the matching public key in DNS.
PFX file full path: click "Browse" and choose the .pfx file on the disk.
Important! If the EasyMail7 Client and EasyMail7 Server are installed on different computers, you must place the .pfx file on the Client’s machine.
PFX file password: password you entered during the export of the .pfx file.
Click on the "Generate DNS TXT Record" button.
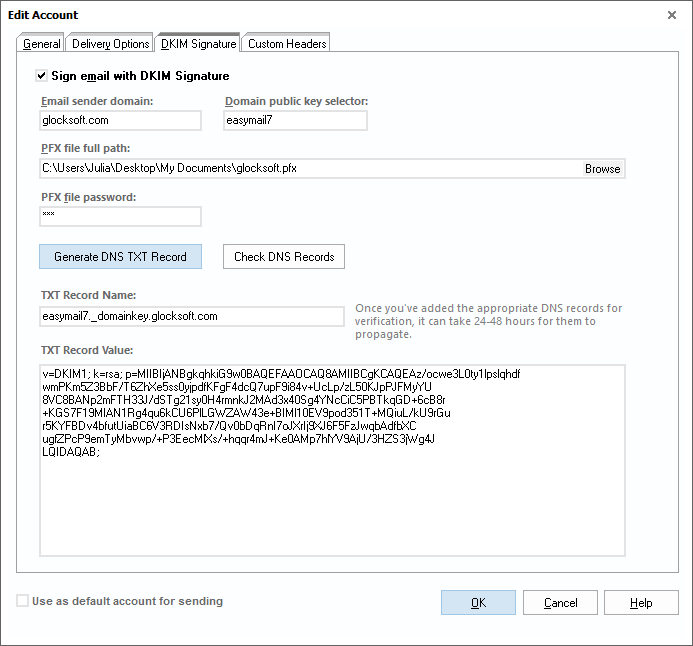
Add the TXT record with the displayed name and value to your DNS records. Depending on the DNS management service you are using, you may need to add the DNS record name without the domain (example: easymail7._domainkey).
Click OK to save the settings.
After the DNS TXT record is added and verified, EasyMail7 will sign all emails sent from this account with a DKIM signature. To verify it, send a test message to your Gmail or Yahoo email address and view the source of the received message. Look for DKIM-Signature: line in the message header.
