How to Add Facebook, LinkedIn and Twitter Links to the Email
The popularity of social networks is slowly but surely surpassing old-school means of communication. As a result, it is becoming quite normal to have your own or your company’s links to Facebook, Twitter, LinkedIn and other social media profiles in the email signature or footer.
It is easy to link to your Facebook, Twitter or LinkedIn page from the message in G-Lock EasyMail7. Just follow the steps below:
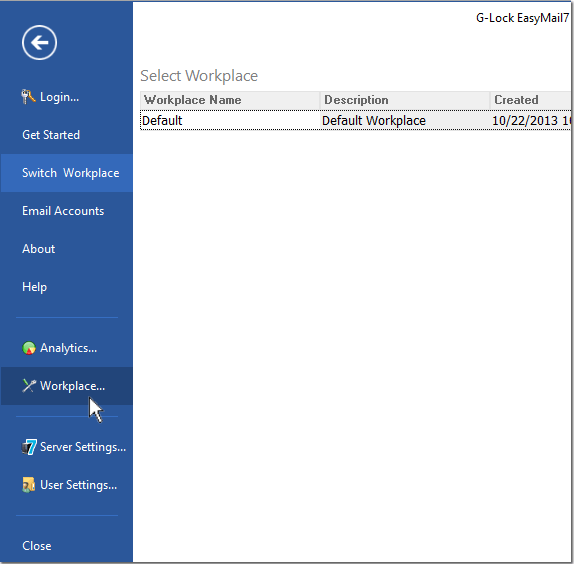
Open G-Lock EasyMail7, login and go to Settings –> Workplace Settings.

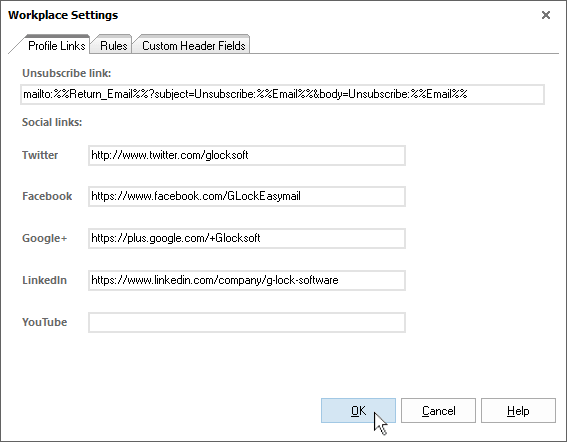
In the Workplace Settings enter the links to your social profiles and click OK.

Create a new message or pick up one your email templates.
Put the mouse in the footer or signature where you want to add a link to your social page, for example, on Facebook.
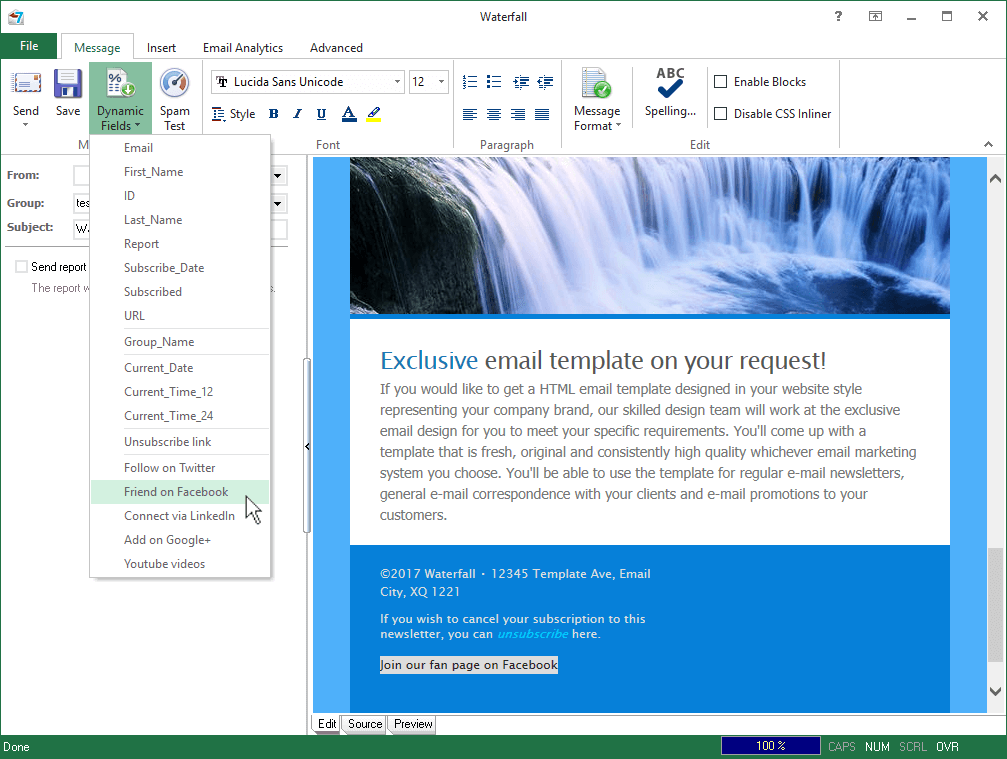
Click on the “Dynamic Fields” menu and choose the “Friend on Facebook” menu item.
You can have your custom anchor text and use a catchy phrase like “Join Our Fan Page on Facebook”.
To do this, type your custom text, highlight it, click Merge and choose “Friend on Facebook”.

It is possible to just add a hyperlink to your social page, but a button with the logo of a specific social network looks more professional.
You can perform a Google search for Facebook, Twitter, etc. icons and download them to your computer. Or if you have a graphic designer in your company, you can ask him to create a nice icon for you.
Alternatively, you can use built-in email templates in G-Lock EasyMail7 which already have social networks icons or design a new template using blocks and footer with embedded icons.
To add social networks links to icons, select the icon, for example, Facebook, click on the Dynamic Fields menu and choose the “Friend on Facebook” menu item.
![]()
The icon will be linked to the Facebook tag:
<a href="tag://%%facebook%%">
During the sending process the tag will be replaced by the actual link from the Workplace Settings.
Social links from the Workplace Settings work for all contact groups.
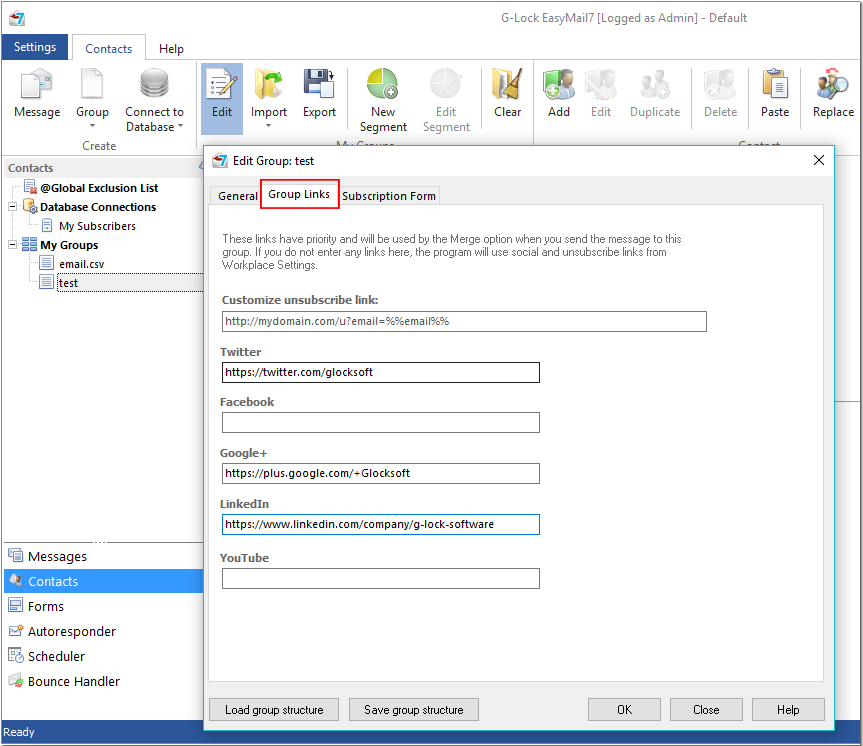
If you wish, you can enter different social links for different groups. To do this, go to “Contacts”, click on the group name and then click “Edit” on the menu bar.
Click on the “Group Links” tab and enter different links to your social pages that you want to send to contacts in this group.
Group Links have priority and will be used in the first place. If Group Links do not exist, the program will take the links to social pages from the Workplace Settings.


