How to Create Users and Workplaces
G-Lock EasyMail7 is a client-server application and consists of two components: EasyMail7 Server and EasyMail7 Client. You can install the EasyMail7 Server on a local computer, Windows server or cloud-based server. The EasyMail7 Server component does all the job: stores contacts lists, email templates, email accounts, and sends messages. You can install the EasyMail7 Client on as many computers as you want, for example, on every computer in the office. You can also install the Server and Client on the same machine.
As admin, you can connect to the EasyMail7 Server through the Client interface and create multiple users and workplaces on the EasyMail7 Server. A user is a person who will be able to connect to the EasyMail7 Server from the Client installed on his/her machine and manage contacts and email messages. A workplace includes email accounts, settings, email templates, sent messages, contact groups and Bounce Handler.
If you are the only person who will work with the program, you can have one user and workplace. If you want multiple persons to be able to send email campaigns using G-Lock EasyMail7 and if your license allows, you can create multiple users and, if necessary workplaces, on the EasyMail7 Server and give the login information to users. As admin, you will assign users to workplaces, i.e. grant users access to workplace(s) they can work within. You can grant one user access to one or several workplaces.
Users will login to the EasyMail7 Server from their EasyMail7 Clients by entering the IP address of the computer/server where the EasyMail7 Server is installed and their username and password set by you. After login, each user can manage contacts and send email campaigns within the workplaces assigned to them. Several users can even work within the same workplace simultaneously.
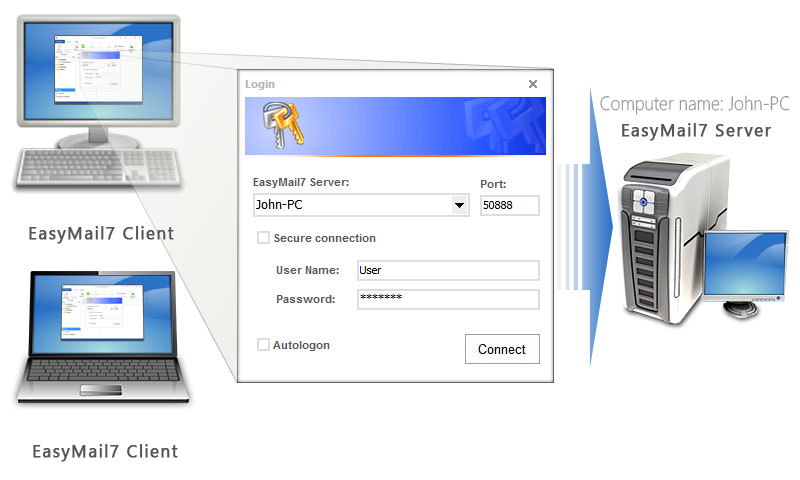
In this tutorial we will walk you through the steps how to add, edit, and delete users and workplaces and assign users to workplaces on the EasyMail7 Server.
Add New User
1. Go to "Settings -> User Settings".
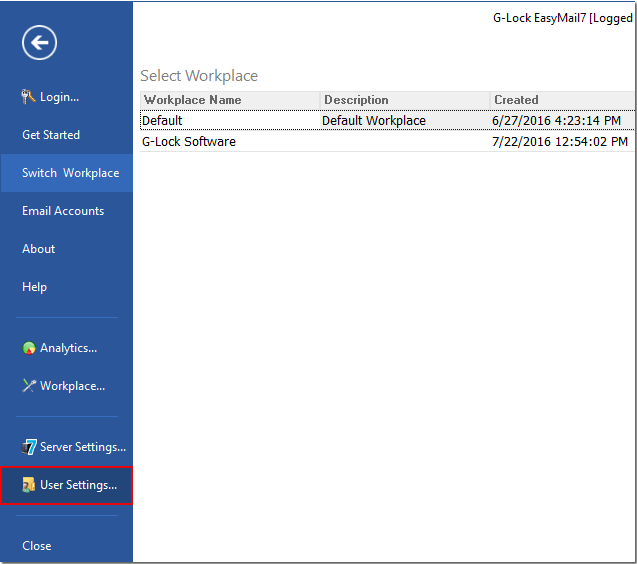
2. Click on "Manage Users".
3. Enter the EasyMail7 Server address.
4. Click on "Connect".
5. Enter your "SuperAdmin" or "Admin" user name and password.
6. Click OK.
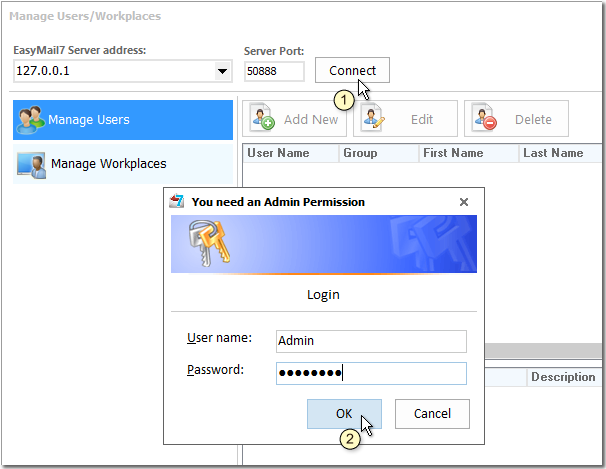
7. Click "Add New".
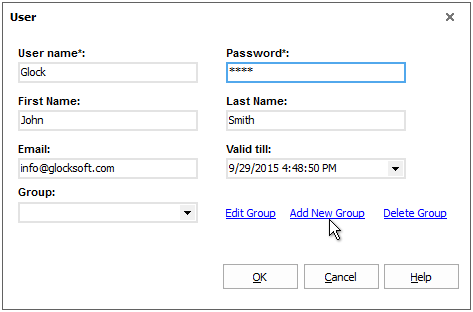
8. Enter the user's information. The fields marked by * are required.
User name and Password – the user will use them to login to the EasyMail7 Server from the EasyMail7 Client.
First Name and Last Name – the user's first name and last name.
Email – the user's email address.
Valid till – choose the user's expiration date. After this date the user will be able to use the program only as “Guest”.
Group – select the user's group. The following groups are available:
Admin – can work with G-Lock EasyMail7, add, edit and delete users and workplaces and assign users to workplaces.
User – can work with workplaces assigned to him by Admin or SuperAdmin.
Guest – can use the program in the "read-only" mode, cannot add, delete or modify any data inside the program.
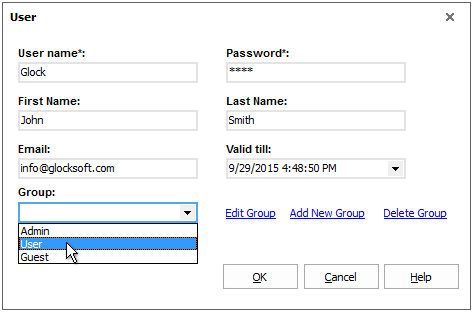
9. Click OK to add the user.
Edit User
1. Select the user in the "Manage Users" panel.
2. Click "Edit".
3. Change the user's information.
4. Click OK to save the changes.
Delete User
1. Select the user in the "Manage Users" panel.
2. Click "Delete".
In addition to existing user groups (Admin, User, Guest), you can create your own group of users with specific rights.
Add New User Group
1. Click on “Add New Group”.
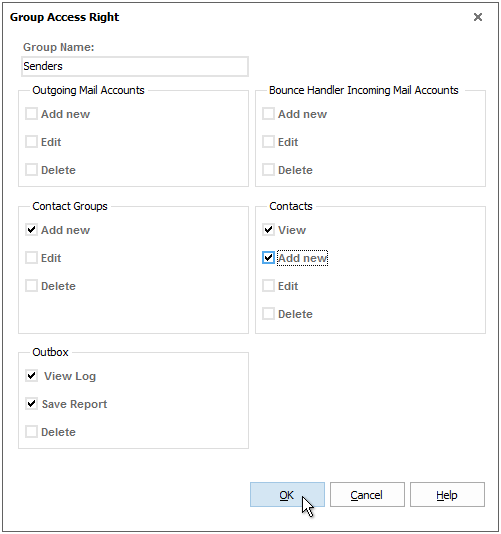
2. Enter a group name.
3. Check the options to define the user access rights.
4. Click OK to create the group.
Edit User Group
1. Select the group name in the Group field.
2. Click on “Edit Group”.
3. Make the changes to the access rights.
4. Click OK.
Delete User Group
1. Select the group name in the Group field.
2. Click on “Delete Group”.
3. Make the changes to the access rights.
4. Click OK.
Add New Workplace
1. Click on "Manage Workplaces".
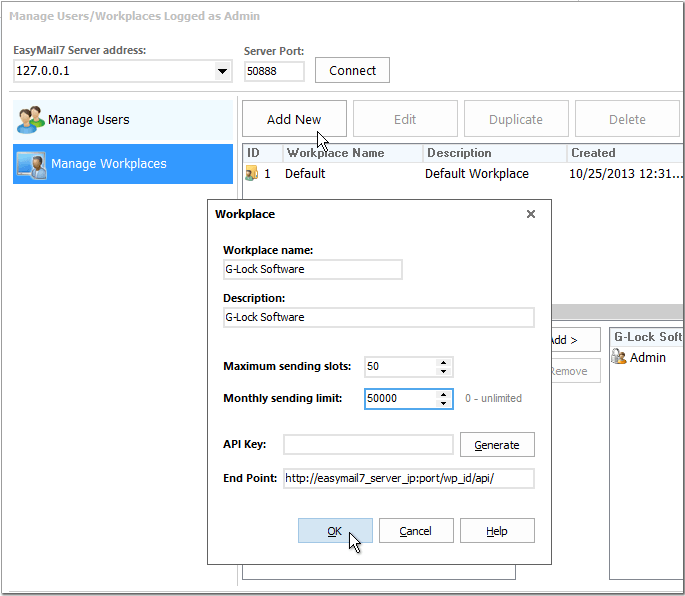
2. Click "Add New".
3. Enter the workplace name, description and sending limitations:
Maximum sending slots – the maximum number of messages users can send simultaneously from this workplace.
Monthly sending limit – the maximum number of messages users can send per month from this workplace. If you create multiple workplaces, you may need to set sending limitations for each workplace to control the server load.
API key – you will generate the API key when you want to connect G-Lock EasyMail7 to a web application through Zapier
Endpoint – will be generated after you click OK to save the workplace. You will need the Endpoint to connect EasyMail7 to web applications through Zapier.
9. Click OK to add the workplace.
Edit Workplace
1. Select the workplace in the "Manage Workplaces" panel.
2. Click "Edit".
3. Change the workplace information and/or sending limitations.
4. Click OK to save the changes.
Duplicate Workplace
1. Select the workplace in the "Manage Workplaces" panel.
2. Click "Duplicate".
Delete Workplace
1. Select the workplace in the "Manage Workplaces" panel.
2. Click "Delete".
After Admin created users and workplaces, he must grant users access or assign users to workplaces they can work with.
Assign User to Workplace
1. Select the user in the "All Users" panel.
2. Click "Add".
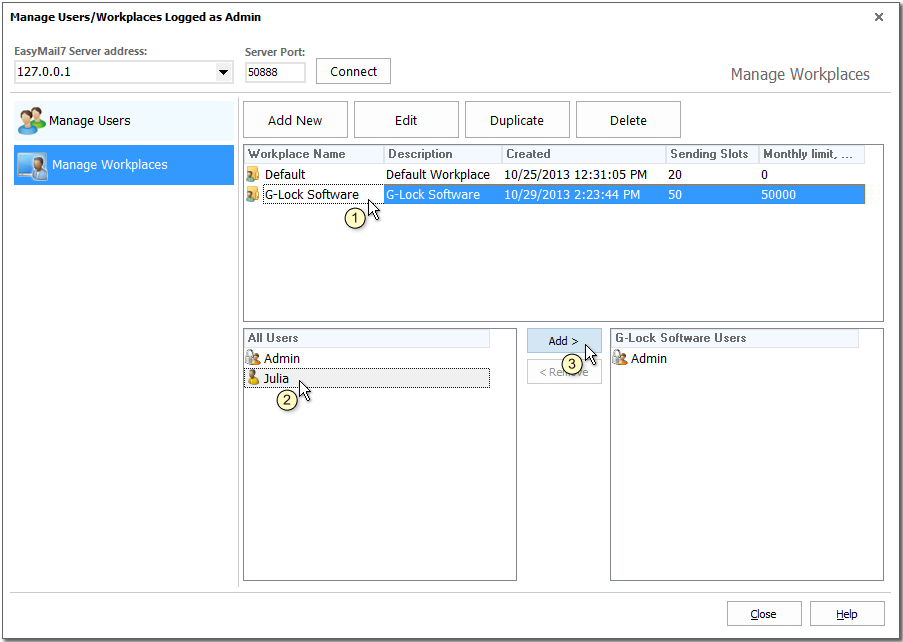
Admin can assign one or multiple users to the same workplace. Multiple users can work with the same workplace either simultaneously or at different time. Each user has the full control under the workplace(s) he is granted access to.
To de-assign the user, select the user and click "Remove".


